|
Working with Acrylics in Painter.
I have some background with acrylics in traditional media, so Painter acrylics haven't presented me with anything I didn't already know. This tutorial is for those that haven't been as fortunate and could maybe use a hand.

First off, if you're a digital image snob (like me) and automatically sneer at anyone that says "use a smudge brush," you're going to need to lose your inhibitions towards something you've probably written off as a "smudge brush" in Painter. This thing in question is the blending tool, which is different to a smudge brush, in that it acts like the blending tools you'd be using with traditional media. Remember this, Painter works more like a traditional medium than things like GIMP or Photoshop. It's alright to use a blending tool here, it's included because traditional media artists use them too.
If you're new to Painter, I suggest you read Metara's intro to Painter first, since it covers things like configuring the tablet. Personally I found it very helpful, especially in my first hours with the program, to be able to refer back to her intro tutorial. Bookmark it, love it, use it.
We won't be covering the stonework here, since that would need its own tutorial and I may write one at a later time.
Get to know your zoom slider at the bottom of your working window. Think of it like having a magnifying lens on an arm like many pros do for the up close and personal tiny details. Also the undo command, which is ctrl+z, though you'll get kudos if you don't use this so much and instead find other ways to correct mistakes.
As always, work with the flow of your piece. If it curves, stroke with the curve, or you'll end up with some very odd looking textures.
Use as few layers as you can, if using just one layer, work from background to foreground.
Save often.
Save your sketch as its own file so you can start over if you need to.
My brush settings are all default for this tutorial.

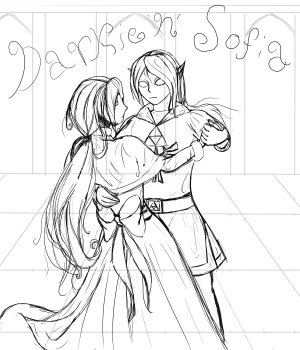
Dark and Sofia
Our subject in question is a piece based on ELOZE, particularly the ballroom scene in Broken Mirror. Even an editor is allowed to be a little 'shippy on occasion, alright?
Who just said "Beauty and the Beast"? Come on, own up... Ah, well, you'd be right anyway. I did base the background off that a bit.
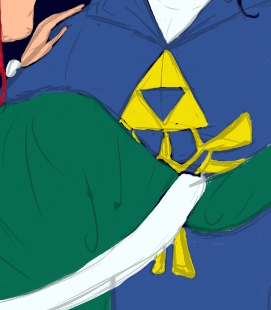
1: Base color. For the characters I used the opaque Acrylic brushes (not thick acrylic) to lay on the base. It's best to use these for the base when laying something over your background, it keeps the color more true to form instead of blending so much with the background. And if you're using any layers, you'll definitely want to use the opaque, as it doesn't have as much semi-transparency as, say, the soft wet acrylic which wants to blend with your canvas base color and is in most cases white, which means you'll get a white outline around things. This isn't so much of a problem if you're working on all one layer, since it then blends with the paint already on the canvas, but since Painter (as far as I know) doesn't come with masking fluid options to mask off around the characters, I've decided to just use a second layer so I can clean up the edges a bit if I need to.
I'm only showing you clips of this since I'm actually working with it at a pretty big size. Pretty solid color, as you can see. I leave the eyes for last and just blot in some light color inside them for now.
Just a note, guys, I rarely work with pure black or white for anything save for sprite work. Dark Link's skin tone and hair here is in fact my "wannabe black" of choice, a severely dark blue.

2: Now the fun starts. Take the wet soft acrylic brushes and start putting in your shadows. You can use the wet acrylics for a slightly more opaque or textured look, but I prefer the wet soft myself, and sometimes the wet detail for the smaller bits.
Got some shadowy color on? Good. Now you can blend it a bit by running the brush over it lightly, your paint will start to blend a bit. But, it could be better, couldn't it? Go check out the tool selection, see where it says "blenders"? You want the one that says "just add water." Resize it as you need to, but you shouldn't really need to fiddle with any other settings. Now, take the blend tool and use it to blend over the shadows you just put on. Nice light strokes following the shape and flow of your piece.
You just had an "ah, I see!" moment, didn't you? The "just add water" tool does what it says on the box, it's like thinning out the paint a little while it's still wet on the canvas, and using that to blend it all together in a softer and more pleasing way.
Need a little sharper shadow to emphasis a crease in clothing, etc.? Use the wet detail brush just to give it a little more edge. Keep a light hand with it and you shouldn't have to blend it much, if at all.
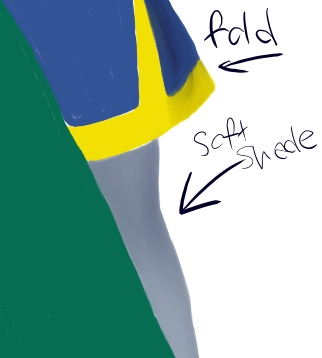
Need more shadow? Blot more paint on using the wet soft brush, then have another go at it with the just add water blender. You can even get some ultra soft gradient effects using this technique, which would be awesome for things like sunset skies and clouds.
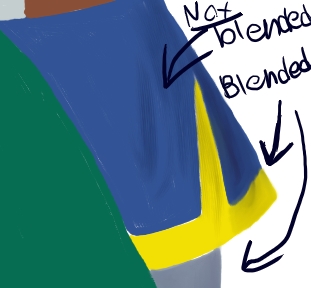
A bit more shadow, a bit more blending...
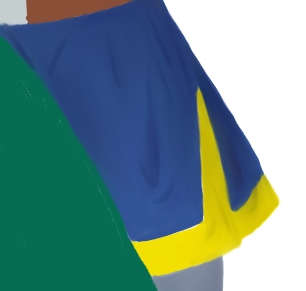
Now we're getting somewhere.

3: Do the same thing for the highlights, only use a light color instead of a dark.
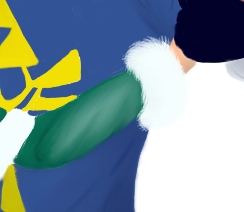
For the fluffy trim here I switched brushes from wet soft to just wet, so I could get a soft furry texture from the bristles. Experiment to find what works for you.

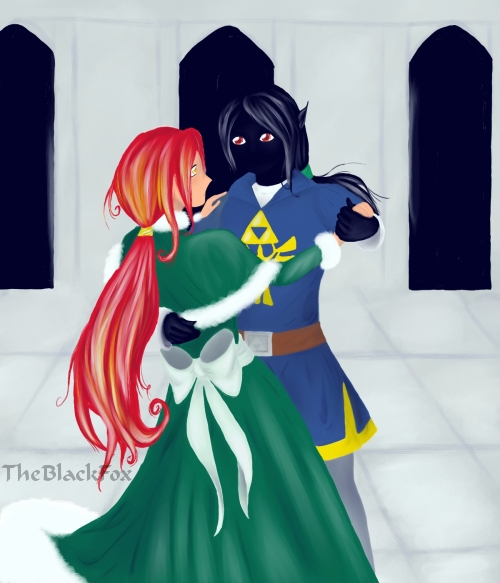
Finished.
If you're wondering about Sofia's hair, it's the same basic principle as the Fantasy Hair tutorial for OC, only here it's been done in Painter X's Acrylics.
| 
